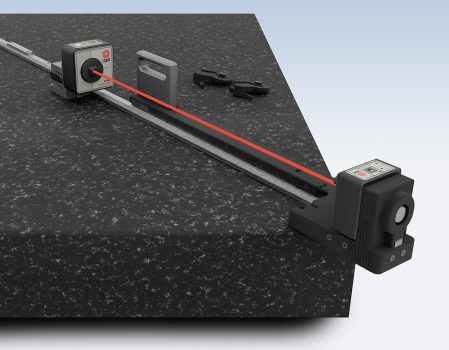
The L-703SP Surface Plate Calibration System offers a much faster and highly accurate way to check the flatness calibration of granite and other types of surface plates:
- Small, compact and light weight laser system with newly designed fixtures and Plane6 Surface Plate Calibration Software to speed up calibration process.
- 30-60% faster than electronic levels, autocollimators and interferometers.
- L-703S Spindle & Straightness Laser is a Geometry laser, not an interferometer, and much easier to use. Breaking the beam is OK!
- T-1297 3-Axis Wireless Straightness Target with a resolution of 10 µin. (0.25 µm), 2-axis, super-linear PSD sensor, Bluetooth communication and a Li-Ion rechargeable battery with 14+ hours life.
- Target measuring base has ±10 µin. (±0.25 µm) mechanical repeatability.
- Easy & fast setup with unique corner-locating tools set the straightedges at the proper border width without marking grid lines the plate!
- Comes with built-in straightedge and dimension scale for fast data taking.
- The standard kit comes with straight-edge lengths up to 72 in. (1.83 m) for plates up to (48×48 in. (1.22×1.22 m).
- Add additional add-on edges for a total length of 126 in. (3.2 m) for plates up to 72×144 in. (1.83×3.66 m). More can be added.
- A measuring increment of .38 in. (9.5 mm) means you don’t need to “cheat” on the last point as most do with electronic levels.
- Plane6 Software features a 3-step procedure that guides you through the process making the system easier to learn.
- The L-703SP kit can also be used, along with Plane6’s Lapping Line View™ software module for a quick spot-check of measurement lines when re-lapping a plate that is out of spec. It only takes 2-3 minutes to spot check the flatness of a line. No need to measure the entire plate to see how well the lapping went. A big time saver! You can record up to 5 runs for each line and the data is plotted on the same graph.
- Check our latest news regarding the US Air Force AFMETCAL contract for purchasing the L-703SP system.


