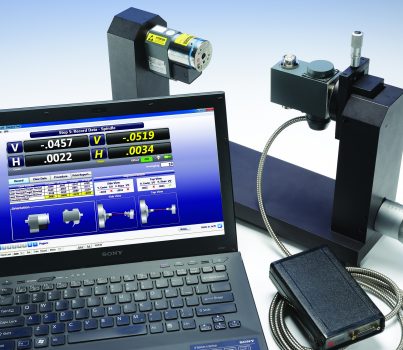
25 years of transfer-line alignment experience, along with many improvements, went into the design of the L-700 Spindle Laser Alignment System that makes checking and adjusting the alignment of transfer line machines much easier and much faster. The L-700 features:
- Aligns transfer line machines up to 70% faster than conventional methods, such as use indicators and alignment bars.
- Extremely simple set up and fixturing.
- 4-axis target sensor simultaneously displays vertical and horizontal center and angle readings
- Real-time alignment data, so alignment errors can be fixed easily and quickly without changing the setup.
- V & H center resolution of .00001 in. (0.00025 mm) and V & H angular resolution of .00001 in/ft (0.001 mm/m).
- Powerful Windows-based Spindle8 Software features step-by-step program flow that even calculates shim values and moves for spindle box alignments.
- Spindle8 Software also corrects mounting errors, saving many thousands of dollars on master parts.
- With the addition of an extra laser, computer interface and 4-axis target, the L-700 can also handle complex dual and multiple-spindle applications


